
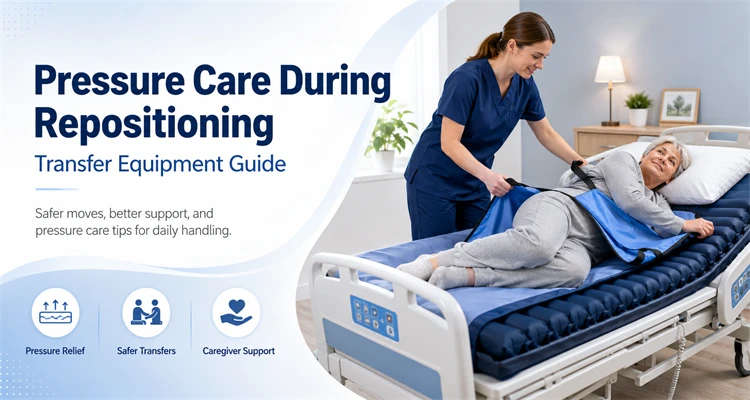
Pressure care does not stop when a person leaves the mattress. Repositioning, moving toward the edge of the bed, transferring into a chair, and settling into a seated position can all change where pressure, friction, and shear occur. A complete routine therefore connects bed-based support with safe handling and seated support.
The transfer method, equipment, number of staff, and sitting plan should come from the individual assessment and current care plan. Mobility, weight-bearing ability, pain, fatigue, skin condition, cognition, body size, and the environment may change what is appropriate from one transfer to the next.
1. Treat Repositioning and Transfer as One Pressure Care Pathway
A mattress supports the person while lying, but the risk pattern changes during movement. Sliding down a raised backrest can increase shear. Pulling across a sheet can add friction. Sitting transfers load the buttocks, thighs, and feet differently, while a poorly fitted chair may concentrate pressure at the sacrum, ischial areas, or behind the knees.
The practical goal is continuity. Before the person leaves one support surface, the next surface and transfer route should already be ready. After the move, staff should confirm that the intended support has been restored rather than treating successful arrival in the chair as the end of the task.
2. Review the Current Care Plan Before the Move
Check whether the person can turn, bridge, sit at the bed edge, stand, pivot, or bear weight. Also review the approved equipment, sling or belt type, number of staff, transfer direction, communication needs, and any limits on sitting time or position.
Changes That Require a Fresh Check
- New pain, weakness, dizziness, fatigue, spasm, or reduced cooperation.
- A change in skin colour, temperature, moisture, swelling, or an existing wound area.
- A different bed, wheelchair, cushion, sling, or transfer aid.
- A change in body weight, limb support, posture, or ability to bear weight.
- A room layout that reduces turning space or prevents correct equipment positioning.
Pause the transfer if the planned method no longer matches the person’s ability or the available equipment. Updating the plan is safer than improvising a lift or pull at the bedside.
3. Prepare the Bed Surface Before Repositioning
Apply the bed brakes, set a workable height, and clear tubing, clothing, blankets, and personal items from the movement path. Confirm that an matelas à pression alternée is operating in the intended mode and that its hoses will not be trapped when the bed profiles or lowers.
If the mattress has a transfer, firm, static, or maximum-inflate function, use it only as described for that model and care plan. Record or remember the normal setting so the system can be returned to the planned mode after the task.
Before-Turn Checks
- Explain the movement and agree on how the person can participate.
- Place slide sheets or other assessed aids before the movement begins.
- Keep heels, elbows, knees, shoulders, and any wound dressing clear of hard edges.
- Arrange lines, drains, and catheters so they do not pull during the turn.
- Ensure the receiving side of the bed has enough space and support.
4. Reduce Friction and Shear During Bed Repositioning
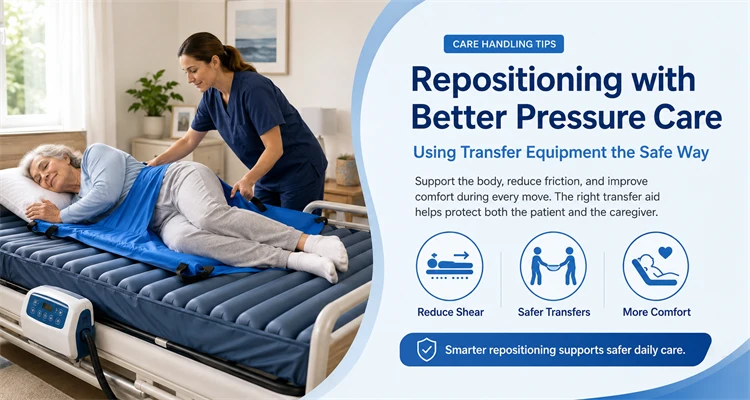
Reposition by lifting or using the selected low-friction aid rather than dragging the body over the sheet. Movement should be coordinated so that the shoulders, pelvis, and legs are supported together and the person does not twist or slide unexpectedly.
When the backrest is raised, observe whether the person migrates toward the foot end. Correcting posture repeatedly by pulling under the arms or across the bed can create additional handling and skin stress. Bed profiling, knee-break position, support pillows, and the care plan should work together to maintain alignment.
There is no single repositioning interval that fits every person. Frequency should reflect the current risk assessment, skin response, support surface, comfort, activity, and ability to change position independently. A mattress function does not replace observation and assisted repositioning when these remain part of the plan.
5. Prepare the Chair and Transfer Route in Advance
Position the wheelchair or chair before the person reaches the bed edge. Apply the brakes, move removable armrests or footplates as planned, and confirm that the seat is stable. The route should be dry, uncluttered, and wide enough for the selected device and staff positions.
Chair Preparation Checklist
- Correct wheelchair width, seat depth, and stated load capacity.
- The prescribed cushion is centred, correctly oriented, and fully supported by the seat base.
- Air cushion inflation, gel position, or foam condition has been checked.
- Cover is dry, smooth, closed correctly, and free from wrinkles or foreign objects.
- Footplates, leg supports, armrests, head support, and pelvic positioning accessories are ready.
- Brakes hold the chair and castors are positioned for the planned transfer.
6. Match Transfer Equipment to the Task
Transfer aids are not interchangeable. Selection depends on how much the person can participate, whether weight bearing is reliable, the direction of movement, the height difference between surfaces, available space, and staff competence.
| Transfer Need | Possible Equipment | Pressure Care Check |
|---|---|---|
| Turn or move up the bed | Slide sheets or repositioning aid | Support the body evenly and remove folds after use |
| Lateral bed-to-trolley move | Transfer board, transfer pad, or air-assisted surface | Bridge the gap and keep skin and tubing clear |
| Seated lateral transfer | Transfer board where assessed | Protect hands and skin and confirm stable surface heights |
| Assisted standing pivot | Handling belt or standing aid where assessed | Do not use a belt as a lifting sling; prepare the chair first |
| Limited or no weight bearing | Mobile or ceiling hoist with compatible sling | Use the specified sling size, loops, support, and staff number |
| Short seated transfer | Patient transfer chair where suitable | Check seat support, brakes, clearances, and final cushion setup |
Follow the equipment instructions and the named transfer plan. Compatibility is especially important for hoists and slings because sizes, attachment systems, and loop markings can differ between manufacturers.
7. Control Pressure During the Bed-to-Chair Movement
Bring the person toward the transfer position without prolonged unsupported sitting at the bed edge. If a pause is required, support the feet and trunk and monitor comfort, balance, and skin contact with the bed frame or equipment.
- Use clear commands so staff and the person move together.
- Keep transfer equipment flat and free from creases or trapped objects.
- Avoid pulling on arms, clothing, dressings, or exposed skin.
- Prevent heels and toes from striking footplates, hoist legs, or the floor.
- Do not leave a person suspended in a hoist or unsupported between surfaces.
- Stop if pain, loss of balance, equipment movement, or an unexpected skin concern occurs.
The shortest route is not always the best route. A transfer that gives equipment enough clearance and allows staff to maintain alignment may be more controlled than a cramped direct approach.
8. Set Up the Wheelchair Cushion Before Seating
The cushion should be fitted before the transfer, not added beneath the person afterwards. Check the front and rear orientation, seat-size match, cover position, valve location, and non-slip base. An overhanging, undersized, reversed, or folded cushion can affect stability and pressure distribution.
Different wheelchair pressure relief cushions require different checks. Foam should retain its shape and support. Gel should be evenly located without bunching or leakage. Air cells should have the model-specific inflation and immersion setting, with the valve closed and accessible.
9. Recheck Position Immediately After Seating
Once seated, move hoist components, transfer boards, slide sheets, or sling material only as the care plan and equipment instructions allow. Leaving a fold, strap, clip, or thick layer beneath the person can create a local pressure point.
Post-Transfer Position Check
- Pelvis is positioned as planned and is not sliding forward or leaning to one side.
- Back, head, arms, thighs, and feet have the intended support.
- The cushion remains centred and has not folded, shifted, or lost air.
- Clothing and continence products are smooth, dry, and not bunched beneath the body.
- The chair does not press behind the knees, against the calves, or at the sides of the hips.
- The person can reach the call system and communicate discomfort or the need to change position.
Observe again after the person has settled. A posture that appears acceptable immediately after transfer may change as the pelvis slides, muscle tone relaxes, or an air cushion redistributes beneath the load.
10. Link the Sitting Plan to the Next Repositioning
A seated pressure care plan should state how position changes will be supported, what the person can do independently, and when staff should reassess comfort and skin. It should also define when to return to bed or another support surface, particularly when sitting tolerance changes.
Small weight shifts, tilt functions, assisted posture changes, and scheduled return to bed may all have a role, but they must match the individual’s chair, cushion, physical ability, and care plan. Do not use a generic sitting-time limit as a substitute for observation.
11. Prepare for the Return Transfer
Before returning to bed, restore the mattress to the required mode and check that the bed height, brakes, side access, hoses, and bedding are ready. Inspect the chair cushion for movement, moisture, or loss of support, and note whether the seated period changed comfort or skin appearance.
After the transfer, remove handling aids that are not designed to remain in place, smooth the bedding, check alignment, and confirm that heels and other vulnerable areas are supported according to the care plan. Return any temporary firm or transfer mode to the normal operating setting.
12. Record Information That Changes the Next Move
Useful documentation is concise and operational. It should tell the next staff member what happened, what worked, and what needs review.
- Time and reason for repositioning or transfer.
- Transfer method, equipment, sling or accessory, and number of staff used.
- Level of participation, weight bearing, pain, fatigue, or balance observed.
- Mattress mode before and after the task.
- Wheelchair cushion type, orientation, and relevant setup check.
- Final posture, comfort, and any skin observation made under the care procedure.
- Equipment fault, alarm, cleaning issue, or change needed before the next transfer.
Escalate changes promptly rather than waiting for routine review. A new transfer difficulty, repeated sliding, cushion instability, persistent redness, damaged equipment, or altered weight-bearing ability may require a revised assessment and care plan.
Common Workflow Gaps
- Preparing the wheelchair only after the person is already sitting at the bed edge.
- Dragging across the bed because slide sheets or staff are not ready.
- Using a handling belt as a lifting device.
- Selecting a sling by colour alone without confirming model and size.
- Placing the cushion after seating or leaving it reversed or underinflated.
- Leaving transfer equipment or folded fabric beneath the person.
- Forgetting to return the mattress from firm or transfer mode.
- Recording only that the transfer was completed, without documenting changes relevant to the next move.
Conclusion
Pressure care during repositioning and bed-to-chair transfers depends on continuity. The bed surface, transfer method, handling equipment, wheelchair, cushion, posture check, and care record should operate as one connected workflow.
Preparing both surfaces before movement, using the assessed equipment, reducing dragging and sliding, checking support after seating, and documenting meaningful changes helps staff repeat the process more consistently at the next transfer.
FAQ
Whether a Pressure Mattress Removes the Need for Repositioning
The support surface is one part of the care plan. Repositioning needs still depend on individual risk, skin response, comfort, mobility, and the current clinical assessment.
When a Slide Sheet Is Used
Slide sheets may reduce the effort and friction involved in selected bed movements. The correct type, technique, staff number, and removal or in-place instructions should be defined by training, assessment, and the product instructions.
How to Choose Between a Standing Aid and a Hoist
The decision depends on reliable weight bearing, trunk control, cooperation, transfer purpose, environment, and the individual plan. A change in any of these factors should trigger reassessment.
Whether a Sling Can Stay Under the Person in the Chair
Follow the sling instructions and individual assessment. Some designs may be intended for in-situ use, while others should be removed because folds, seams, clips, or fabric can affect comfort, posture, and skin contact.
What Should Be Checked After a Bed-to-Chair Transfer
Confirm posture, cushion position, foot and limb support, clothing and sling material, comfort, skin observations, chair stability, and access to the call system. Record changes that may affect the next move.