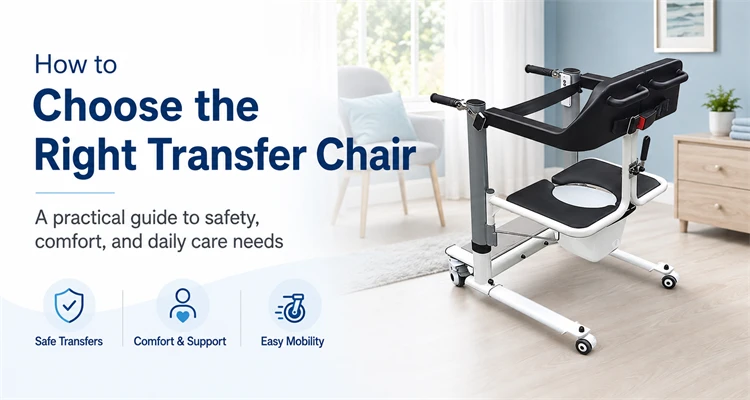
Choose a transfer chair by matching three things: the person's current transfer ability, the geometry of the starting and receiving surfaces, and the workflow required to move between them. A suitable chair must fit all three; a high load rating or wide lift range cannot compensate for the wrong transfer method or an approach that does not fit the room.
The selection process should begin with an individual moving-and-handling assessment and end with a trial in the real environment. Use product specifications to narrow the options, then verify positioning, locks, clearances, caregiver access, comfort, cleaning, and recovery from a foreseeable equipment problem.
1. First Decide Whether a Transfer Chair Is the Right Equipment Type
A transfer chair is usually designed to receive a person in a supported seated position, change seat height, and move over a short indoor route. This makes it different from equipment that supports the whole body, assists standing, or performs a lateral transfer while the person remains lying.
If the person cannot maintain the posture required by the chair, cannot participate as specified, or needs a full-body sling, another transfer system may be more appropriate. The equipment category should follow the assessment rather than the preference for a compact chair.
| Transfer Requirement | Equipment Often Considered | Selection Gate |
|---|---|---|
| Supported seated transfer | Height-adjustable transfer chair | Can the person remain seated with the available supports |
| Assisted standing and pivot | Standing transfer aid | Is weight bearing reliable and is hand or trunk control sufficient |
| Little or no weight bearing | Full-body hoist with assessed sling | Are the hoist, sling, attachments, and staff plan specified |
| Lateral seated movement | Transfer board where assessed | Can both surfaces be aligned and the person participate safely |
| Lateral lying transfer | Transfer mattress, pad, board, or air-assisted system | Does the task require the person to remain recumbent |
| Mobility after transfer | Wheelchair or transport chair | Is the equipment intended for travel rather than only transfer |
Do not use a handling belt as a lifting sling, and do not treat a transfer chair as a substitute for floor recovery, stair transfer, or long-distance transport unless the exact product is designed for that task.
2. Build a One-Page Transfer Task Profile
Before comparing models, describe the complete transfer in one page. This prevents the selection from being driven by a single attractive feature.
Information to Capture
- Starting surface, receiving surface, and return transfer.
- Person's ability to sit, cooperate, bear weight, grasp, and communicate discomfort.
- Body weight, hip width, thigh depth, lower-leg position, and any asymmetry.
- Number of transfers, typical duration, and time of day when ability may change.
- Required staff number, side of approach, and communication sequence.
- Dry, toileting, bathing, or mixed-use environment.
- Doorways, turns, thresholds, carpet, slopes, and storage location.
- What should happen if the chair cannot lift, lower, or move as expected.
Repeat the profile when health, weight bearing, posture, pain, equipment, room layout, or staffing changes. A chair selected for an earlier level of ability may no longer fit the current transfer.
3. Define the Person-Fit Envelope
The working load should exceed the person's current weight within the conditions stated for the product, but load capacity is only the first boundary. Seat width, opening width, thigh support, back support, foot clearance, body shape, and centre of mass also affect fit.
Person-Fit Checks
- The person fits between seat and frame components without side compression.
- The seat supports the thighs and pelvis without a hard edge behind the knees.
- Back and pelvic supports match the available seated posture.
- Safety belts or positioning supports contact the intended body area.
- Feet and lower legs remain clear during closing, lifting, movement, and lowering.
- Pain, spasm, stiffness, dressings, tubes, and fragile skin are accommodated.
A wider chair is not automatically safer. Excess internal width can reduce lateral stability and make locks, arm supports, or handles harder to reach. The frame must provide clearance without allowing uncontrolled movement inside the seat.
4. Measure the Geometry Chain From Start to Finish
The transfer only works when the chair can approach the starting surface, collect the person at the required height, clear the furniture, and align with the destination. Measure the full chain rather than comparing seat height alone.
For patient transfer chairs, record the lowest and highest usable seat height, not only the actuator or cylinder stroke. Include the thickness of the seat pads, bed mattress compression, wheelchair cushion, toilet seat, and any raised or removable components.
Geometry Measurements
- Occupied bed-edge height in the transfer position.
- Wheelchair or chair seat height with its cushion loaded.
- Toilet or commode height and clearance around the bowl where relevant.
- Transfer-chair minimum and maximum occupied seat height.
- Leg, base, pedal, battery, or actuator clearance beneath each surface.
- Space required to open, close, and lock the seat structure.
- External width at the widest point and turning space with the operator present.
A nominal height overlap does not guarantee alignment. Upholstery compression, a raised bed backrest, uneven flooring, furniture rails, and a loaded cushion can change the usable position.
5. Use the Three-Clearance Test
A quick geometry check can be organised around three clearances: approach clearance, lifting clearance, and exit clearance.
Approach Clearance
Confirm that the legs and frame can reach the required position around or beneath the starting surface. Check castors, pedals, battery boxes, linkages, and low furniture rails.
Lifting Clearance
Raise only enough to release the seat from the starting surface. Confirm that feet, clothing, tubing, seat halves, locks, and frame parts remain clear through this movement.
Exit Clearance
Make sure the chair can reverse, turn, and leave without striking furniture or forcing the operator into a twisted posture. Repeat at the destination, because the approach direction may be different.
6. Evaluate Seat Closure and Support as a Sequence
Many transfer chairs use split seat sections or an opening frame. The important question is not only whether the seat closes, but whether staff can position, close, lock, verify, and later reopen it without trapping clothing, skin, tubing, or accessories.
- Both seat sections align without being forced.
- Primary and secondary locks give a clear visual or tactile confirmation.
- The back support and belt can be applied from the available working side.
- No buckle, hinge, seam, or hard edge sits beneath a high-load body area.
- The person remains centred as the chair begins to lift.
- Opening is prevented until the destination surface provides support.
If staff need to reach beneath the person repeatedly to confirm hidden locks, or if seat halves become misaligned under load, the chair may not be suitable for that workflow even when its dimensions are adequate.
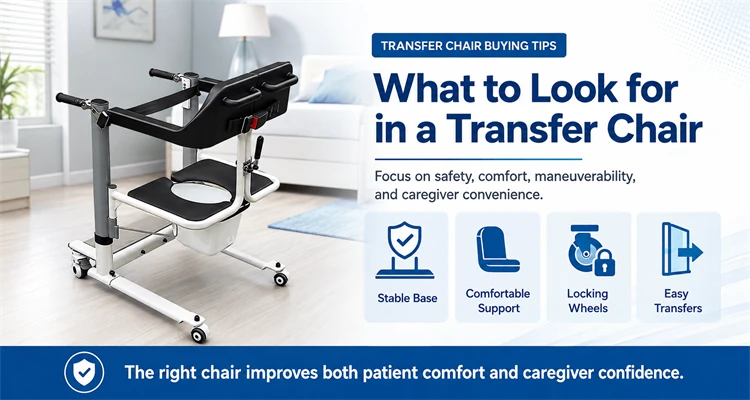
7. Choose the Control Method After Fit Is Confirmed
Electric and hydraulic systems should be compared only after the chair fits the person and transfer geometry. The control method changes operator effort, readiness, and maintenance, but it does not repair an unsuitable frame or seat.
| Operating Question | Electric System | Hydraulic System |
|---|---|---|
| How height changes | Button-controlled actuator | Repeated foot-pedal pumping |
| Routine readiness | Battery charge and control functions | Pump, pedal, valves, and seals |
| Operator movement | Hand operation near the handles | Foot access and stable pumping posture |
| Holding and lowering | Actuator and control design | Check valve, cylinder, and release valve |
| Failure response | Emergency stop and model-specific backup lowering | Controlled release and service response for hydraulic faults |
| Best trial question | Can repeated cycles be completed within the charging and duty plan | Can staff pump and meter descent without awkward posture |
The right answer depends on the actual operating profile. A powered system may reduce repetitive pumping, while a hydraulic system removes battery charging. Both still require pre-use checks, training, maintenance, and a response plan.
8. Test Movement With the Person and Operator Positions Included
Castor diameter and turning radius are useful specifications, but push effort and control should be tested on the actual floor. Small thresholds, thick carpet, grout lines, ramps, wet surfaces, and tight turns can change how the chair behaves.
Route Test
- Start, stop, reverse, and turn with a controlled representative load.
- Check whether all castors swivel without sudden sideways movement.
- Confirm brakes can be reached and give a clear locked state.
- Observe handle height, wrist position, foot placement, and visibility.
- Pass through the narrowest door with hands and body inside the safe envelope.
- Check floor transitions without pulling the chair sideways or using excessive force.
9. Match the Chair to Toileting, Washing, or Dry Transfer
Only choose features required by the task. Toileting may require a compatible seat opening, bowl clearance, hygiene access, and surfaces that can be cleaned around hinges and locks. Showering requires explicit wet-area suitability, corrosion resistance, drainage, and protection of all electrical components where applicable.
10. Check Daily Reset, Cleaning, and Storage
A chair can fit the transfer but still fail operationally if it cannot be cleaned, dried, charged, inspected, and returned to its starting configuration between uses.
- Can seat pads, belts, and removable supports be cleaned without losing orientation.
- Are hinges, locks, castors, and frame joints accessible for inspection.
- Does the cleaning method match the materials and electrical protection.
- Is there a dry storage position that does not block corridors or emergency routes.
- Can batteries be charged without trailing cables or exposure to wet areas.
- Are replacement pads, belts, locks, castors, chargers, and batteries identifiable.
When equipment is shared, the cleaning responsibility, inspection point, storage location, and method for reporting faults should be visible to every shift.
11. Complete a Three-Transfer Trial
A single successful demonstration may hide fatigue, positioning drift, or a difficult return route. Use three planned transfer cycles before acceptance, with the actual trained staff and representative surfaces.
Trial 1 - Learn the Controls
Complete the transfer slowly, confirm every lock and clearance, and record where staff need prompts or additional access.
Trial 2 - Repeat the Normal Workflow
Repeat without coaching. Observe setup time, body position, communication, push effort, seat alignment, and whether the chair is reset correctly.
Trial 3 - Test a Foreseeable Variation
Use a different bed height, route direction, loaded cushion, battery state, or approved scenario that reflects normal variation. Do not create an unsafe fault for demonstration.
For electric patient transfer chairs, include the low-charge response and documented backup-lowering sequence in staff training. For hydraulic models, include a height-hold observation and controlled release check.
12. Use Clear Rejection Criteria
Do not accept a chair only because most features are satisfactory. Certain problems mean the model or transfer plan needs review.
- The person cannot maintain the posture required by the chair.
- The occupied seat does not align with either transfer surface.
- The frame cannot approach without collision or unsafe staff posture.
- Seat sections or locks cannot be verified consistently.
- Feet, skin, clothing, or tubing enter a pinch or contact area.
- The chair drifts, lowers unpredictably, alarms, leaks, or cannot stop as commanded.
- The route requires excessive force or cannot be controlled at thresholds and turns.
- Cleaning, charging, inspection, or emergency recovery cannot be completed as specified.
13. Record the Final Transfer-Chair Setup
- Exact chair model, working load, seat size, and lift range.
- Named starting and receiving surfaces and their transfer positions.
- Approved control method, seat locks, supports, and accessories.
- Transfer direction, operator positions, and required staff number.
- Route, thresholds, doors, and furniture configuration.
- Pre-use checks, cleaning, charging, storage, and fault reporting.
- Emergency response and when to stop using the chair.
Conclusion
The right transfer chair is the model that fits the assessed transfer method, the person's body and seated ability, the full geometry chain, the route, and the daily operating system. No single specification can establish that fit.
Start by confirming the equipment category, build a transfer profile, measure clearances, test seat closure and support, select the control method, and complete repeated transfers. Accept the chair only when the complete process can be reproduced predictably.
FAQ
The First Thing to Check When Choosing a Transfer Chair
Confirm through the moving-and-handling assessment that a seated transfer chair is the correct equipment type. Then measure the person and the complete transfer environment.
How Much Weight Capacity Is Needed
The person's weight must remain within the chair's stated working load under the specified conditions. Also check body width, centre of mass, seat dimensions, frame stability, and future change.
Whether Electric or Hydraulic Is Better
Neither is automatically better. Choose after confirming fit. Compare repetitive operator effort and charging requirements with pedal access, hydraulic inspection, transfer frequency, and the available maintenance system.
Whether One Transfer Chair Can Fit Every Bed and Wheelchair
No. Surface height, under-frame clearance, cushions, bed rails, frame legs, approach direction, and occupied compression can make apparently similar furniture incompatible.
Why a Real-Environment Trial Is Necessary
Specifications cannot fully show push effort, lock access, operator posture, furniture collision, loaded alignment, cleaning time, or how consistently different staff can repeat the transfer.